WordPress Installation
Creado en Translate, but avoid returning ending dots: 31 Marzo, 2020 | Help Pages | 27,693 vistas | 1 minutos leído
WordPress Installation
First thing you need to do is install and activate the Insert Headers and Footers plugin. For more details, see our step by step guide on how to install a WordPress plugin.
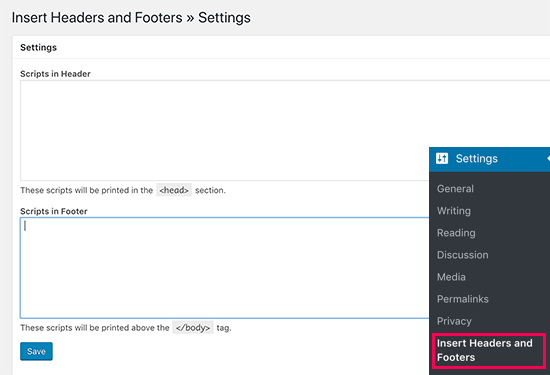
Once the plugin is activated, go to Settings » Insert Headers and Footers from your admin panel. After that, you will see two boxes for adding code to header and footer.

Simply paste the Pixel Code in one of the two boxes. Once done, don’t forget to click the Save button to store your changes.
The plugin will now automatically load the code in the respective locations on your WordPress site.
You can always edit and remove any code that you don’t want to keep.
You’ll need to keep the plugin installed and activated at all times. Deactivating the plugin will stop adding all custom code to your site.
If you accidentally deactivate the plugin, the code will still be safely stored in your WordPress database. You can simply reinstall or reactivate the plugin, and the code will start appearing again.
Note: You may have to clear your WordPress cache after saving changes, so the code properly appears on the front-end of your website.